Wednesday, December 29, 2010

Christmas 2010 Do-It-Yourself Presents

Everyone has received their presents, so it's time to share my do-it-yourself present of the year.  Well, all except one person - so act surprised when you get your gift! 

I made Rice Therapy Bags that can either be heated or kept in the freezer, depending on if your muscles or headaches like heat or cold more!  I read about a variety of fillers, such as flax seed and Bulgar, but plain rice seemed to work well.  If anyone ever has a problem with it smelling off, return and I will refill with fresh filler!

I made three different types of therapy bags.  Each piece had an inner rice bag made of muslin and filled with essential oil scented rice and an outside cover.  The neck bags and eye pillows have lavender scented rice for it's relaxing qualities.  I just filled a bowl with rice and added essential oils until I thought the scent was about right.  Below you can see the rice bag for the neck therapy bags, wrinkled because this was Joe's bag and it has already been used - by me!

 Next you can see the cover for the eye pillow.  See how each cover has a simple folded edge that makes it really easy to put the heated or cold bag in and take it out.  I made the covers with a soft flannel and a pretty brown corduroy.  This project started as a reuse project.  I was looking for ways to reuse old clothes that weren't really good enough to give away.  I had a long brown corduroy skirt with a hole in it that I used for these covers.  Can you just imagine putting the warm bag inside the cover and laying the soft warm flannel against your tired eyes after a day at the computer?


 I also made some with some soft green flannel.  This is the finished neck bag and also a square muscle therapy bag I made with muscle cooling mint essential oils.  It feels good on my knees and I made myself 2 of them!  I am finding these indispensable during ski season already!

 Below, you can see how I wrapped them pretty and put directions on them.  I took the idea for the bags and directions from the SewMamaSew blog, but she had her directions in a pdf and I needed to make changes so I redid them.

 I hope everyone enjoys their bags and they help your neck and other muscles to relax.  Finally, it is ski season so we will end with the requisite ski hill picture.  This was taken Dec 28th at Steamboat - it was a perfect day on the slopes.  More snow is on the way today!

Sunday, December 26, 2010

Christmas Treat #6: Toffee

A short post this morning.  There are a lot of toffee recipes and I used the one off joyofbaking.com for Buttercrunch Toffee.  Toffee is always a winner.  It has crunch and chocolate and it's not hard to make.  I tend to play with the chocolate.  Here I used almonds for the nut; mixed bittersweet and dark chocolate and used brown rice Syrup in place of corn syrup.  I only need one word to describe it, Yum!


I'm not taking time to type the recipe, as snow awaits!  This picture was taken on the Five Chair at the Canyons on Christmas Eve.  This chair leads us to my all time favorite run, Mystic Pines.  If I could only do one run for the rest of my life, that would be it!

Friday, December 24, 2010

Christmas Treat #5: Peanut Butter Fudge

I'm in a candy mood this Christmas.  It's best that way, I'm not very interested in eating candy, only making it.  This is the easiest fudge ever and Joe gave it high compliments.  Of course, he's just high on sugar at this point, so....   Most of you know I love peanut butter, no I am not exaggerating.  It is the only thing I feel the need to give up regularly - for a couple days - just to prove I can.  But I am picky, I won't even touch the stuff with sugar in it.  Just plain ground peanuts for me please!


Peanut Butter Fudge
1 cup smooth peanut butter ( I used natural peanut butter with no sugar)
1 cup unsalted butter
1/4 teaspoon salt
1 teaspoon pure vanilla extract
1 pound powdered sugar

Line the bottom and sides of an 8x8x2 inch pan with aluminum foil or wax paper.

Place the peanut butter, butter, and salt in a large microwavable bowl and cook in the microwave for two minutes on high.  Stir and continue to microwave (if needed) until the ingredients are completely melted.  Stir in the vanilla and powdered sugar.  Spread the fudge into the prepared pan, smoothing the top with an offset spatula or spoon.  Cover and place in the refrigerator until cool. 

Can be stored in the refrigerator for up to one week.

Notes:  I may try chunky peanut butter next time and a little less powdered sugar.  But I think by using the natural peanut butter that adds to the peanut flavor and keeps it from being too sweet.

I think I got this recipe from joyofbaking.com.

Thursday, December 23, 2010

Christmas Treat #4: Date Nut Balls

I just love dates.  I'm not sure where this came from, but this time of year I am delighted to easily find them in the store and I am on my 3rd box already.  I enjoy them chopped up in cereal or oatmeal, straight when I need a sweet fix without candy, and my go to appetizer this fall is Blue Cheese stuffed Dates wrapped in Bacon.  You yeah - go ahead and imagine what that tastes like - but don't wait long if there is a plate of them around, because they go fast!

This is another treat out of the Grandma Heuermann book of recipes.  I googled "date ball recipes" to determine if I wanted to make a change and most recipes are pretty similar.  I really enjoy these and one of them totally takes care of me when it comes to sweets.  But hey, a combination of dates and coconut, do we expect them to be anything less than great?!!?


Date Nut Balls - Thanks to Grandma H
1 cup sugar
1/4 lb butter
1 cup dates, cut up
1 egg, beaten
1 teaspoon almond extract
2 cups puffed rice cereal (I use Kashi 7 Whole Grain Puffs)
1/2 cup chopped nuts (I use pecans)
Enough Coconut, in which to roll balls. 

Mix sugar, butter, dates and egg in a nonreactive saucepan.  Cook for 10 minutes on low and stir constantly.  Cool.  Add almond extract, cereal and nuts. 

Form into small balls and roll in coconut.  I used a small sized cookie scoop to form the balls and drop in the coconut.  It worked perfectly without the messy hands! 

Notes: I use sweetened coconut, only because I can't get unsweetened locally, but it's on my list for Salt Lake City and I think these would be great with unrefined sugar and unsweetened coconut.

I am becoming a big fan of having many sizes of cookie scoops, they can be used for so many great things not only cookies, but candy, melon balls, etc.  They aren't cheap, but fast becoming an essential kitchen utensil for me!

Wednesday, December 22, 2010

Christmas Treat #3: Grandma's famous Cinnamon Cookies


I can't put it off any longer.  These are the cookies, of which I will make multiple batches and give the most away.  These are my husband's favorite cookies.  They come from Grandma Heuermann and are cinnamon shortbread type cookie.  I've already made 2 batches this year and foresee the need for another, luckily - they are easy!  If you love Cinnamon as much as I do you'll understand that I have been known to serve these for dessert with homemade Cinnamon Ice Cream and hot coffee.  Yum Yum!


Cinnamon Cookies - Thanks to Grandma H
1/2 lb. butter
1 cup sugar
3 teaspoons cinnamon
1 egg, separated
2 cups flour

Cream the butter and the sugar.  Add the cinnamon and 1 egg yolk in order, mixing well after each addition.  Then mix in the flour, just until mixed.  It may seem a little dry, don't worry.

Dump on a large cookie sheet with sides and spread flat on the cookie pan.  I find it works best (less messy) to spread it out with a piece of saran wrap between my hands and the cookie dough.  Get it as thin as possible. 

Brush with the 1 unbeaten egg white and sprinkle with finely chopped pecans.  Bake 15 minutes at 375 degrees.  Or just until lightly golden across the top.  Cut immediately after baking.

Christine's Alteration:  I always have to make the above recipe as is, but for me I often make a batch using whole wheat (regular or pastry) flour and unrefined sugar.  Just as good, but different, these have a more caramelized flavor.

Tuesday, December 21, 2010

Christmas Treat #2: Pumpkin Waffles and Coconut Macaroons

A marathon baking session takes sustenance, plus my poor husband has not had a good breakfast in way too long.  Sunday morning before beginning with cookies and candy, and after shoveling the driveway and doing an early morning grocery store run, I made Pumpkin Waffles.  I just love Pumpkin Waffles and have, of course, adapted a recipe that came with my Cuisinart, 2 slice waffle iron.


Super Multigrain Waffles - with Pumpkin additions

Ingredients:
1 cup whole wheat flour
1/2 cup unbleached flour - I usually use all whole wheat.
1/2 cup old fashioned oats
1 teaspoon baking powder
1 teaspoon baking soda
1/2 teaspoon salt
2 eggs, lightly beaten
1 cup soy milk(I usually use whatever I have, often FF or skim regular milk)
2 Tablespoons pure Maple Syrup
1 teaspoon pure vanilla
6 Tablespoons unsalted butter, melted
2 Tablespoons flaxseed oil
1 cup  yogurt
Can add 1/2 cup fruit and 1/2 cup nuts.

To make Pumpkin:
I substitute Pumpkin for the yogurt and add 1 teaspoon of cinnamon, 1/4 teaspoon nutmeg, and 1/8 teaspoon cloves

Other changes: I am always messing with the butter, oil ingredients.  I often substitute a couple tablespoons of ground flax seed for a couple tablespoons of butter.

Directions:
Place flours, oats, baking powder, baking soda and salt in mixing bowl and stir to combine.  In a separate bowl stir together eggs, milk, syrup, and vanilla.  Add to the dry ingredients. Stir in butter, oil, and yogurt (or pumpkin).  Let batter rest for 5 minutes while your waffle iron is heating up.

Cook waffles as directed by your waffle maker.

The real treat for today is Coconut Macaroons.  These did not visually turn out as I imagined, but they are good.  I think this may be a recipe that needed to be changed a bit for our altitude.  For festive reasons, and just because everything is better with chocolate, I melted a little dark chocolate and drizzled it on top.  I am not going to share the recipe because it is pretty vague and there are much more detailed recipes throughout the web, just google Coconut Macaroons and try one!  If you are looking for a fairly easy and quick recipe, that is actually not horrible on calories, this is your cookie!

Monday, December 20, 2010

Christmas Treat #1: Pecan Brittle

This week on the blog we have a special treat!  I'll be doing daily blog posts with a different cookie or candy that I've made for Christmas every day.  With any luck, I'll keep baking and have to go beyond Christmas Day with this plan!

Those of you that are familiar with my Christmas baking, know that I almost always make peanut brittle.  The recipe is from my Mom and we love it.  But, this year I am having trouble finding raw peanuts, so I thought well, I've seen brittle with other nuts... and I have pecans...  I haven't given up on finding raw peanuts, but this will hold us over until I do.


I did a google search and picked a recipe from the Savour Fare blog.  It is different than my peanut brittle recipe.  Two main differences are no butter and 1 Tablespoon of apple cider vinegar.  I know!  I ready that and thought really? But, the candy is really good and easy.  You can click here to go to the Savour Fare blog and find the recipe.  It takes a candy thermometer, but there isn't any reason to be afraid of a candy thermometer.

Enjoy!

Thursday, December 16, 2010

Deja Vu

I'm going to post an update to Joe's August post regarding breaking his ankle.  Our week started out at the hospital 8 AM Monday for the second surgery on Joe's foot.  This surgery took out all his hardware and unfortunately, also found some tears in the tendon by his ankle, right where he'd been having pain and swelling.  This is good because everything is out of the ankle and the Dr. sewed up the tendon tears, everything can heal now.  This is challenging for Joe because he was ready to be done and fixed.

 Joe is back in a cast for 3 weeks and on crutches. The Dr. compromised and said he could start putting some weight on it in a few days and work down from two crutches to one, but he still needed to go in the cast.  In order to sew up the tendon tears the Dr. had to remove some of the connective tissue between the bone and the tendon, which needs to heal. At least it's festive!

Here is the 4 screws and the plate, all washed up and out of his ankle.


We are thankful we aren't flying this Christmas and had sadly admitted it would be hard to go to the planned Bronco game on Dec 26th.  After a couple days of wallowing, which was easier since I had to be in Phoenix Tues/Wed, Joe has risen to his normal good attitude.  He had graciously said I should ski as much as I can since it's already a good snow season.  We'll see what that means.  :)

For those that like the yucky pictures, there is a scar just like this on the other side of his foot.  :) I think he was just worried the scar wouldn't be impressive enough only being cut once.


Thanks to our friends for the wonderful support, help and good wishes.

Tuesday, December 14, 2010

Growing Greens in Winter

Last year I requested an Aerogarden for Christmas - thanks Marilyn!  It grew herbs last winter but this winter I thought I'd see if I could grow some fresh salad greens.  It will be interesting to see how long the greens keep growing as I use them, but I'm enjoying them so far.


Saturday, December 11, 2010

Spaetzle

That's right, for all you Germans out there I made Spaetzle Sunday night.  I was cookbook browsing for a comforting, warm dinner idea and I came across the recipe for Herb Spaetzle - I thought "I have a Spaetzle maker"!  Thanks to Grandma Lisel and my mother-in-law for passing it on, originally because I was talking about ricing potatoes.

I do not have a picture of the Spaetzle, it looked lovely on the platter surrounding a sliced port roast, with roasted vegetables on the side, but of course, after we'd all dug in Joe said, "Did you take a picture?"  For those that don't know what Spaetzle is, it's like a German noodle, or dumpling, similar almost to gnocchi.


This recipe is from the Farm to Table Cookbook: The Art of Eating Locally by Ivy Manning. It's a lovely book organized by seasons, which is my favorite way for cookbooks to be organized.

Herb Spaetzle
3 eggs
3/4 cup milk
1 teaspoon salt
1/4 teaspoon black pepper
1 Tablespoon minced mixed fresh winter herbs (thyme, rosemary, sage)
2 1/4 cups flour (I used white wheat flour)
2 Tablespoons butter

1. Whisk the eggs, milk, salt, pepper, and herbs in a medium bowl.  Sift the flour over the mixture and stir with a wooden spoon until smooth and thick.

2. Bring a large pot of salted water to a simmer.  Hold the spaetzle maker over the water and add 1/4 of the batter.  Scrape it back and forth, forcing little bits of batter into the simmering water.  Remove the bits with a slotted spoon as they float to the top (almost immediately), transfer them to a saute pan with the butter, and keep them warm over low heat while continuing to cook the remaining batter.

3. When all the batter is cooked and in the saute pan, raise the heat to high, briefly toast the spaetzle in the butter until golden brown, and serve.
-----------------------------------------
We ended this meal with the perfect dessert, a wonderful Gingerbread cake found on the Simply Recipes blog and posted by Garrett McCord.  The below picture is from that wesite, although my cake was very similar, my plate wasn't nearly so pretty.

Gingerbread Cake

Thursday, December 9, 2010

Soup and Bread

Is there anything better than a bowl of hot soup with a piece of crusty on the outside, soft on the inside, warm, fresh bread?  I have been trying to make a big pot of soup every week for lunches during the week or even suppers, if the hubby is gone or I have evening meetings.

This past week I enjoyed a nice pot of Black Bean soup.  Of course I add more vegetables than they called for including a package of the handy garden kale in the freezer and I pureed some of the beans.  One of these days I'm going to have to give in and get a pressure cooker just for making beans.  I'm not the best at getting my beans rehydrated and soft enough.


It took us awhile to get the hang of bread here in Green River, WY.  Being around 6,500 feet means one had to make some changes to the bread.  Joe is actually the guy who figured it all out.  Back when I was working on the last degree, he patiently made batch after batch lowering the yeast each time.  We use almost 3/4 t. less than the recipe lists.  Then I figured out the next trick - more water!  This is just a 100% whole wheat loaf using the bread maker and look how high it is!  WooHoo!


Back to the sewing machine and my Christmas project.  I look forward to posting about it, after everyone has their presents, of course!

Tuesday, December 7, 2010

Busy

Well I am feeling a bit pressed for time right now, so this will be short.  I can assure you that I have pictures to post but for now I will leave you with a rather unappetizing picture - I do apologize - and a quick note about a problem solved.  There are two things of which I never use a whole can: tomato paste and chipolte chilies.  The problem is they only last so long in the fridge and too often I end up throwing 1/2 a can away, not to mention I end up with red stained tupperware dishes! 

Well I finally got on the stick on Sunday and pulled the tomato paste and chipolte chilies out of the fridge.  I sprayed my handy ice cube tray with a little oil and divided them out into individual portions, about 1 T for the tomato paste and one chili per each cube.  I stuck them in the freezer and a few hours later went back out and popped them out and into separate baggies.  How great!  I've already used a chili this week in a soup, it was both easy to use just one and I must say it was easier to chop up the chili without making a total mess of my cutting board!

If, as I am, you are a little overwhelmed right now with work, the presents that need to get mailed soon, the Christmas letters that are written but still not printed out, and the increase in social activities (which are supposed to be fun!), the ski patrol cross I really must get sewed on my jacket, and more; I wish you a quite moment with a Tom and Jerry, or your favorite warm drink, in hand and the Christmas tree lights to gaze upon.


Tuesday, November 30, 2010

Holiday Season

While I'm sure there will be many more posts of soups and winter meals, in my head the holiday season has started so I thought it appropriate to dress up the last post of November as we head into the land of sweets.

I didn't put up as many decorations as usual but, I had to show my welcome sign.  I apologize, I'm thinking I got this from my mother-in-law, but if I'm wrong I'm sorry!  I've always loved this sign, but just had it sitting on a ledge in the past. This year the lack of stress has let through a few creative juices and I thought - but wait - I have the perfect place for it where the welcome sign normally is and I have some red raffia that will act as the perfect hanger.  Two minutes later - ta da!


I don't put up a tree every year because we always see one when we visit family.  No family this year, so I decided a tree was in order.  It's a little rough and I'm not sure how long the needles will last, but it's twinkly, gold, red, festive and makes me smile.


In the coming month, I wish everyone:
  • Time with friends and family
  • Laughter
  • Joy
  • Renewed energy
  • Time for self
  • A couple of your favorite cookies - don't settle for the ones that aren't important!
  • Reflection on the past and excitement for the future
  • And for us skiers......Snow, Snow, and more Snow!

Saturday, November 27, 2010

Pumpkin Pecan Pie

Those of you that know my husband, know he's a pie guy.  Unfortunately, with my attempts to eat low sugar he doesn't get as many pies as he deserves.  When it comes to Thanksgiving pie, he's also a Pecan Pie guy.  I made an attempt to satisfy both of our tastes here, and while this is a very good pie, I think I should just make two pies in the future. 


I obtained this pie from FoodBlogga's blog.  It's actually a pie from Dorie Greenspan, so that there tells you it is worth making!  It's called Dorie Greenspan's Thanksgiving Twofor Pie.  It's not just a pumpkin pie topped with pecans, it really has mixed the pumpkin and pecan fillings.  It is very good and Joe seemed happy, but the pecan filling piece made it way too sweet for me. 

I think I'll stick to my pumpkin in the future and just make Joe a real Pecan Pie.  But, for those of you that don't think "too sweet" is possible, try this pie!  I topped it with some Cinnamon Whipped Cream for Joe.


My head is starting to think it's baking season.  How many cookies I make, is really going to depend on how many I can give away as my office mates don't eat many these days!  Watch for more cookie and dessert postings coming up - along with a very happy husband I am sure!

Friday, November 26, 2010

The Makings of a Thanksgiving Appetizer

I hope everyone had a very enjoyable Thanksgiving.  My contribution to this years Thanksgiving meal with friends turned out to be rolls and appetizer.  As I thought about what type of appetizer to make, I thought it shouldn't be too filling.  One of the things I've been having fun with in the past year or so is making homemade crackers.   They are so easy!  And.... they give me a reason to use those silly specialty cookie cutters I bought in a moment of weakness.

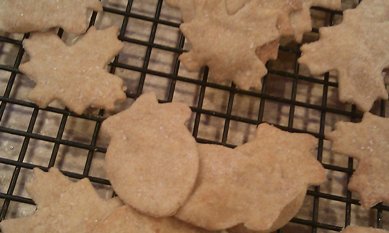
So first, I went to the old standby book King Arthur Flour's Whole Grain Baking and chose the tried and true Wheat Thin recipe on p. 164.  This is a book everyone should have if you like to use whole grains.  It covers everything from crackers to flatbreads, yeast breads, cookies, cakes, and more!  As you can see, I used small leaf and acorn cookie cutters.


Wheat Thins

1 1/4 cups (5 ounces) whole wheat flour, traditional or white whole wheat
1 1/2 tablespoons sugar
1/2 teaspoons salt
1/4 teaspoon paprika
4 Tablespoons butter
1/4 cup water
1/4 teaspoon vanilla

To make the dough: Combine the flour, sugar, salt and paprika in a medium bowl.  Cut the butter into small pieces and mix it in thoroughly, using your fingers, a pastry blender, a mixer or a food processor.  Combine the water and vanilla, and add to the flour mixture mixing until smooth. 

Preheat the oven to 400 degrees F.  Lightly grease the baking sheets or line with parchment paper.

To Roll and Cut the Dough: Divide the dough into 4 pieces; keep the other pieces covered while you work with one at a time.  Lightly flour your work surface and your rolling pin and roll the piece of dough into a large rectangle, which should be at least 12 inches square when trimmed.  Keep your pin and the surface of your dough evenly floured.  Flip the dough frequently to keep it from sticking, but too much flour will make it difficult to roll.  Keep rolling until the dough is as thin as you can get it without tearing, at least 1/16 inch thick.  Trim the dough to even the edges and use a pizza cutter or a sharp knife to cut the piece into squares approximately 1 1/2 inches wide.  Transfer the squares to a prepared baking sheet; you can crowd them together, as they don't expand while baking.  Sprinkle the squares lightly with salt, if desired.  Repeat with the remaining pieces of dough.  Save the scraps under plastic wrap and reroll them all at once just one time.

To Bake the Crackers: Bake the crackers, one sheet at a time, until crisp and browned, 5 to 7 minutes. If some of the thinner crackers brown too quickly, remove them and return the remaining crackers to the oven.  These crackers bake quickly, so watch them closely -- even 30 seconds can turn them from golden brown to toast!  Remove the crackers from the oven and cool on the pan or on a plate; they cool quickly.  These crackers will stay crisp for several days, but are best stored in airtight containers.

I find a sure winner for a light appetizer addition to be a spiced nut.  I made the following Spiced Party Pecans.  I obtained this recipe from the Cooking Light Community - Great Food Discussion Thread, but it was listed as being from The New Basics Cookbook by Julee Rosso and Sheila Lukins.


Spiced Party Nuts
1/2 teaspoon ground cumin
1/2 teaspoon chili powder
1/2 teaspoon curry powder
1/2 teaspoon garlic salt
1/4 teaspoon cayenne pepper
1/4 teaspoon ground ginger
1/4 teaspoon ground cinnamon
2 tablespoons olive oil
2 cups shelled whole almonds or pecan halves
1 tablespoon Kosher salt (optional)

  1. Preheat oven to 325 degrees F.
  2. Mix cumin through cinnamon in a bowl and set aside.
  3. Heat the oil in a nonstick skillet over low heat.  Add the spice mixture and stir well.  simmer to mellow the flavors 3-4 minutes.
  4. Mix the nuts with the spices and spread in a single layer on a baking sheet.  Bake for 15 minutes, shaking the pan once or twice.
  5. Remove the baking sheet from the oven, and using a spatula, toss the nuts with any spices and oil on the bottom of the sheet.  Sprinkle with salt as desired and allow to cool.  Store in airtight jars.
The full appetizer included a Smoked Salmon Dip that was enjoyable with the wheat thins, but since I never follow a recipe for my Smoked Salmon Dip, I didn't take a separate picture!  :)


Joe and I are very thankful for wonderful friends, with whom, we can share meals, laughter, stories, and wine.

Monday, November 22, 2010

Soup and Rolls

Winter has arrived and to be honest I am fully enjoying the regular snow.  It's hardly been cold, so we can't complain about cold, we just get to enjoy the snow.  The best part was it came in Saturday afternoon after giving us a last good Saturday morning to blow, rake, and otherwise collect the final leaves from the front and back yard.  We mulched as many as we could fit in the compost area that holds the brown compost and trucked the rest to the green dumpsters!  Well after a morning of leaf work, my stomach was calling for soup.

I made this lovely Lentil soup that is very good and I'm enjoying for lunches this week.  Sorry, I didn't follow a recipe.  It started with the normal saute of onion, celery, carrot, and I added the ham about 1/2 way through.  Then I sauteed some cumin and black pepper for just a few seconds and added the rinsed lentils, 2 diced tomatoes, chicken broth, and a bay leaf. 


On Sunday afternoon, I wanted to test drive a roll recipe for Thanksgiving.  These did not turn out real pretty, meaning perfectly round.  But they are really good!  They are called Fast and Flexible Whole Grain Rolls.  They are 100% whole wheat flour and they called for bulgar, but I was out.  This was a surprise to me, so I had to choose a different grain, or walk the whole 3/4 block to the store ... I chose another grain.  So these were made with cracked wheat.  They are surprisingly light for Whole Wheat.  It's hard to make a bread recipe come out perfect here the first time because of high elevation. I cut back the yeast, but next time will add a little more moisture also to see if they rise more.  Also, since I used plain whole wheat flour, not bread flour I may add some gluten next time.


Fast and Flexible Whole-Grain Rolls
from The New whole grains cookbook by Robin Asbell
Ingredients:
2 cups water, divided, for Bulgar, or 1 1/2 cups water for cooked grains
1/2 cup Bulgar or 1 cup cooked grain
1/4 cup honey (not raw honey, it may kill the yeast)
1/2 cup olive oil or nut oil
1/2 teaspoon rice vinegar
1 Tablespoon quick-rise yeast
5 cups whole wheat bread flour, divided
2 teaspoons salt

Directions:
Bring 1 1/2 cups water to a boil in a small saucepan.  Add the Bulgar and return to a full, rolling boil.  Cover, lower the temperature t a simmer for 10 minutes, then let stand for 5 minutes.  Add 1/2 cup cool water to bring the temperature down.  (If you planned ahead when making last nights dinner and are using cooked grain, bring 1 1/2 cups water to a boil, add the cooked grain, and remove from the heat.)

Stir the honey, oil, and vinegar into the hot grain mixture.  Take the temperature of the mixture, and follow the yeast package recommendations, letting it cool if necessary.  In a stand mixer or larger bowl, mix 4 cups of the flour with the yeast and salt.  Using the dough hood, stir in the grain mixture.  Knead to mix.  When the flour is mixed in, knead in the remaining cup, to make a soft dough.  The dough will seem sticky in the bowl, but you should be able to handle it without it sticking to your hands.  Oil a large mixing bowl and scrape the dough into the bowl.  Cover tightly with plastic wrap and let it rise in a warm place for at least 45 minutes and up to 3 hours.

Oil a heavy sheet pan.  Preheat the oven to 375 degrees F.  The dough should be bigger than it was.  Tear off small handfuls of dough, about three-fourths of the size you would like the rolls to be.  Roll each piece into a ball, and place on the oiled pan. Lightly cover with a sheet of plastic wrap.  Let rise in a warm spot for at least 30 minutes.

Bake for 15 minutes.  Slide the rolls off the pan onto a rack to cool.

This is one of my favorite books, the author does a great job of introducing lots of different grains and using them a variety of ways.

Monday, November 15, 2010

Travels


It was a lovely visit to La Jolla last week. But to be fair, it started out lovely.


What is that a picture of you ask?  Leg room ... glorious leg room.  There was no seat in front of me!  Nobody putting his/her seat back into my knees.  Take note everyone, that is someone else's space or knee caps you are impinging on when you put your seat back.  On the flight to Tampa, I stood for two hours, bless those kind flight attendants, because my legs were literally cramping after one hour of my knees hard against his seat.  Apparently, he needed that space more than me, so I kindly just got up and stood, so he wouldn't have to sleep with my knees in his back.  That apparently brought me good karma, as I easily obtained exit rows both ways on this trip. Karma rocks!  Well, except between Rock Springs and Denver, but if you've been on those planes, you'll understand that it's just easier to sit with legs in the isle on those planes, in all the seats!

The conference was nonstop from Wed - Sat Noon, but I did manage in that time to eat some great food, all of it seafood, either in the raw sushi form or the Bouillabaisse form. Then Saturday afternoon, those of us not flying out till Sunday, went down to the beach, for the whole afternoon, we successfully alternated between the beach and beer. 


Yes, a perfect afternoon and early evening.

It is the beginning of a very different, but still beautiful week here.  I'll leave you with a picture that, while it does not show the amazing blue sky that is outside my window, does show our unmarked driveway.  Covered in snow with no place to go.  It's going to be a great winter!


Wednesday, November 10, 2010

Pumpkin Flan

On Sunday we were lucky enough to be invited for dinner and some Packer game watching at a friends house.  I brought this Pumpkin Flan.  It went pretty well, considering I've never made flan before, but had some Pumpkin and wanted something custard like.


from Pumpkins and Squash by Kathleen Desmond Stang

Brazilian Butternut Flan (I subbed Pumpkin for Butternut squash)
1 1/2 cups sugar
3 large eggs, beaten
1 1/4 cups mile, half and half, or canned evaporated milk
Dash of salt
1 cup butternut, calabaza, or other winter squash puree

Place 1 cup of sugar in a large heavy skillet over medium-high heat.  Cook, without stirring until the sugar begins to melt.  Reduce the heat to low and cook and stir until it turns a golden brown, about 8-10 minutes.  Quickly pour the caramel into a 9 or 10 inch deep dish pie plate and tip to coat the bottom and sides.

Preheat the oven to 350 degrees and put water on to boil.

Beat the eggs with the remaining 1/2 cup sugar.  Stir in the milk, vanilla, salt, and squash.  Strain the mixture and pour into the Carmel-lined pan.  Place in a large baking pan and add boiling water halfway up the side of the pie plate.  Bake for 45-50 minutes, or until set in the center when gently shaken.  Remove from the hot water and chill for at least 4 hours or overnight.

To serve, loosen the custard with the tip of a knife.  Place a platter on top and quickly turn over.  Hold in place until the caramel flows out.

Monday, November 8, 2010

Roasted Beet Pizza

I can hear everyone going really?  Roasted Beet Pizza, has she lost it?  Perhaps, but it was still yummy!


One night when Joe was gone, I roasted some beets in smaller than normal cubes, sauteed up some beet greens with garlic and shallot and rolled out a small thin round of whole wheat pizza dough.  I layered the beets, beet greens, and feta cheese on the pizza and baked.  Next time, I may try it with goat cheese as that was my hardest decision this time.. feta or goat cheese?

Thursday, November 4, 2010

Final Garden Bounty

Last weekend was closure for the garden this year.  The shallots and garlic for next year were planted a couple weeks ago, so we dug up everything else in the garden.  This is what we still had thriving as of October 31st.  Swiss Chard, Cabbage, Kale, Parsley, Carrots, Beets, Cauliflower, Broccoli, and 2 little Kohlrabi.

After digging up the vegetables, we mixed in this summers batch of compost and loosened all the soil.  Lorna scored some straw off the local pumpkin patch on Monday to cover the garlic and shallots.  It is ready for a long. cold winter.  It's starting out warm and mediocore - but a ski girl doesn't give up hope for a long, cold winter!

Then I went home and looked at everything I carried into the house. I stored, most of it, but dealt with the parsley.  I made 2 batches of Parley Walnut Pesto.


I just tossed in parsley, walnuts, parmesan, lemon juice, salt, pepper, and olive oil to taste. After whirring it up in the food processor, I sprayed two ice cube trays lightly with some oil, put in the pesto and froze for a day.  The next day I pulled them out, popped them out of the ice cube trays and put them all in  quart baggy.  So I have about 1-2 tablespoon portions of pesto to use throughout the winter to throw fresh taste into vegetables and pastas.

Sunday, October 31, 2010

Fall Flavors Highlighted

Yesterday was a wonderful day focused on me!  I didn't do any chores, grade any assignments, or rake any leaves (although they do need raking).  If I didn't do any of that necessary stuff, how could I possibly have passed the time you ask?  There was a good workout, a great hour of yoga, a wonderful hour massage, a couple hours putzing in the kitchen, and lovely visiting time with friends.  Can a woman really take a day that is relaxing and allows her to recover from the week without guilt?  Yes!  Do it my friends!

See full size imageI have a lot of perfect fall vegetables in the house right now, and when I was planning yesterday's dinner, I was focused on using a lovely Kambucha squash, I'd picked up.  Now, I view almost all winter squash as interchangeable as long as you keep in mind some are sweeter or have more water than others.  The Kambucha has the most wonderful deep orange flavor; it's wonderfully sweet, without any added sweetness; and it has a low water content.  I found the perfect recipe, and then of course, changed it a bit!

Last nights dinner really highlighted many perfect fall flavors for me.  It started with a wonderful salad.  I had pears, toasted walnuts, and blue cheese over spinach.  I made a quick Dijon vinaigrette.  And then, I moved on to this Butternut Squash & Roasted Garlic Crostata with Parmesan-Herb Cornmeal Crust.


I found this recipe on the Hungry Cravings blog.  I mostly followed the recipe, but I added a couple cups of sliced Swiss Chard to the roasted butternut squash, before piling it onto the dough.  I do believe almost anything can be improved with added Swiss Chard or Kale!

Do you have kitchen tools that seem unused?  The below scraper has been one of those tools for me.  I usually scoop up the chopped vegetables with my hand or slide them off the cutting board, forgetting to get out these scrapers to scoop them up.  But, as I make more Crostata type things I find this is the perfect tool for slipping under rolled dough to flip the dough over the edges of filling.  Phew, I knew I'd find a use for the scraper that has been in my drawer for 4 years now!

Now ... you guessed it.... I'm off to grade assignments and rake leaves.

Sunday, October 24, 2010

Dinner Alone

Joe has been busy lately, as he's started teaching one night a week and then there is hunting and various other activities, so I've been enjoying some dinners alone.  Many of you know I am very lucky.  Joe is great about eating whatever I make and has very few things he doesn't like.  He'll even happily eat meatless meals.  But I do feel guilty sometimes as I do not seem to need meat nearly as often and am quite happy without it.

So, I will share some of my recent meals, of which, many of you will say really?  Where's the meat?  But I adored them! I didn't follow any recipes so will just have to make up names and give general directions.

Chard, Squash, and White Bean Bake
Last night, I looked in my vegetable drawer and started chopping.  I already had some peeled butternut squash, which I could eat every day!  I then lightly sauteed some shallot, garlic, and the stems of the swiss chard, and softened just briefly the chopped swiss chard leaves.  All of this came from our garden!  I mixed the squash, onion and chard, about 1/4 cup of rinsed white beans, salt, pepper, and Parmesan cheese together. Look at those bright colors before putting it in the oven at 350 for about 40 minutes and the wonderful caramelized yumminess after.


Winter Green Fig Salad
Next, you will remember the figs I alluded to in the previous post. They were the highlight of a lovely salad earlier this week.  A very simple light dinner. Using the winter greens growing on my deck full of wonderful hearty flavors like kale and beat greens, I topped the greens simply with a light dressing made of oil, honey, and cinnamon; some cottage cheese and the glorious figs.


I think I'm headed out to cut some of those winter greens for lunch!